Reboot CMS auf Borstensohn
Torsten Borstensohn testet Reboot CMS
Reboot CMS
A flat file, Markdown CMS in PHP, inspired by Pico, Redaxo and Craft CMS.
Reboot CMS is a minimal CMS without a database, but with the support of blocks to structure the content.
Why another CMS?
I developed Reboot CMS because I couldn't find a CMS that works with flat markdown files but allows easy use of blocks.
Reboot CMS is very small and the pages are delivered extremely fast. My website shaack.com, built with Reboot CMS, has a PageSpeed Insights performance score of 100.
Websites using Reboot CMS
Minimum System Requirements
- PHP 8.0 or higher
- Web Server: Apache with mod_rewrite (or compatible server)
- No database required — all content is stored as flat files
Install
Clone or download the Reboot CMS repository:
Quick Start
Run the CMS with PHP's built-in web server (no Apache or Docker needed):
The site is available at http://localhost:8080, the admin at http://localhost:8080/admin.
You can specify a custom port: ./run.sh 3000.
Docker / Podman
The site is available at http://localhost:8080.
Production Setup
Point your web server's document root to the web/ directory. The CMS should work out of the box.
On first visit to /admin, you will be prompted to create an admin account.
Directory Structure
core/src/— Core CMS classes (Reboot, Site, Page, Block, Request, AddOn)site/— Site content:pages/,blocks/,addons/,template.php,config.ymlweb/— Document root (index.php,.htaccess)local/— Local environment config (config.yml,.htpasswd) — not in gitcore/admin/— Admin interface (itself a Reboot CMS site)
Configuration
site/config.yml— Site-wide settings: addon registration, navbar withbrandandstructurelocal/config.yml— Local/environment settings (not committed to git):
Available editor tools: Headings, Bold, Italic, Strikethrough, UnorderedList, OrderedList,
InsertLink, InsertImage. Use "|" for a separator. The admin tools (InsertPageLink, InsertMedia,
InsertBlock) are always appended automatically.
Template
The file site/template.php is the main HTML template. It receives three variables:
$site— theSiteobject$page— thePageobject$request— theRequestobject
Call $page->render($request) to render the page content and $page->getConfig() to access the YAML front matter.
Documentation
Page
Folder: /site/pages
A Page can be a flat Markdown file, can contain Blocks or also can be a PHP file.
PHP pages receive the same variables as the template: $site, $page, and $request.
Pages are auto-routed on web-requests:
index.mdorindex.phpwill be shown on requesting/NAME.mdorNAME.phpwill be shown on requesting/NAMEFOLDER/index.md(or .php) will be shown on requesting/FOLDERFOLDER/NAME.md(or .php) will be shown on requesting/FOLDER/NAME404.md(or .php) will be used as a custom 404 error page
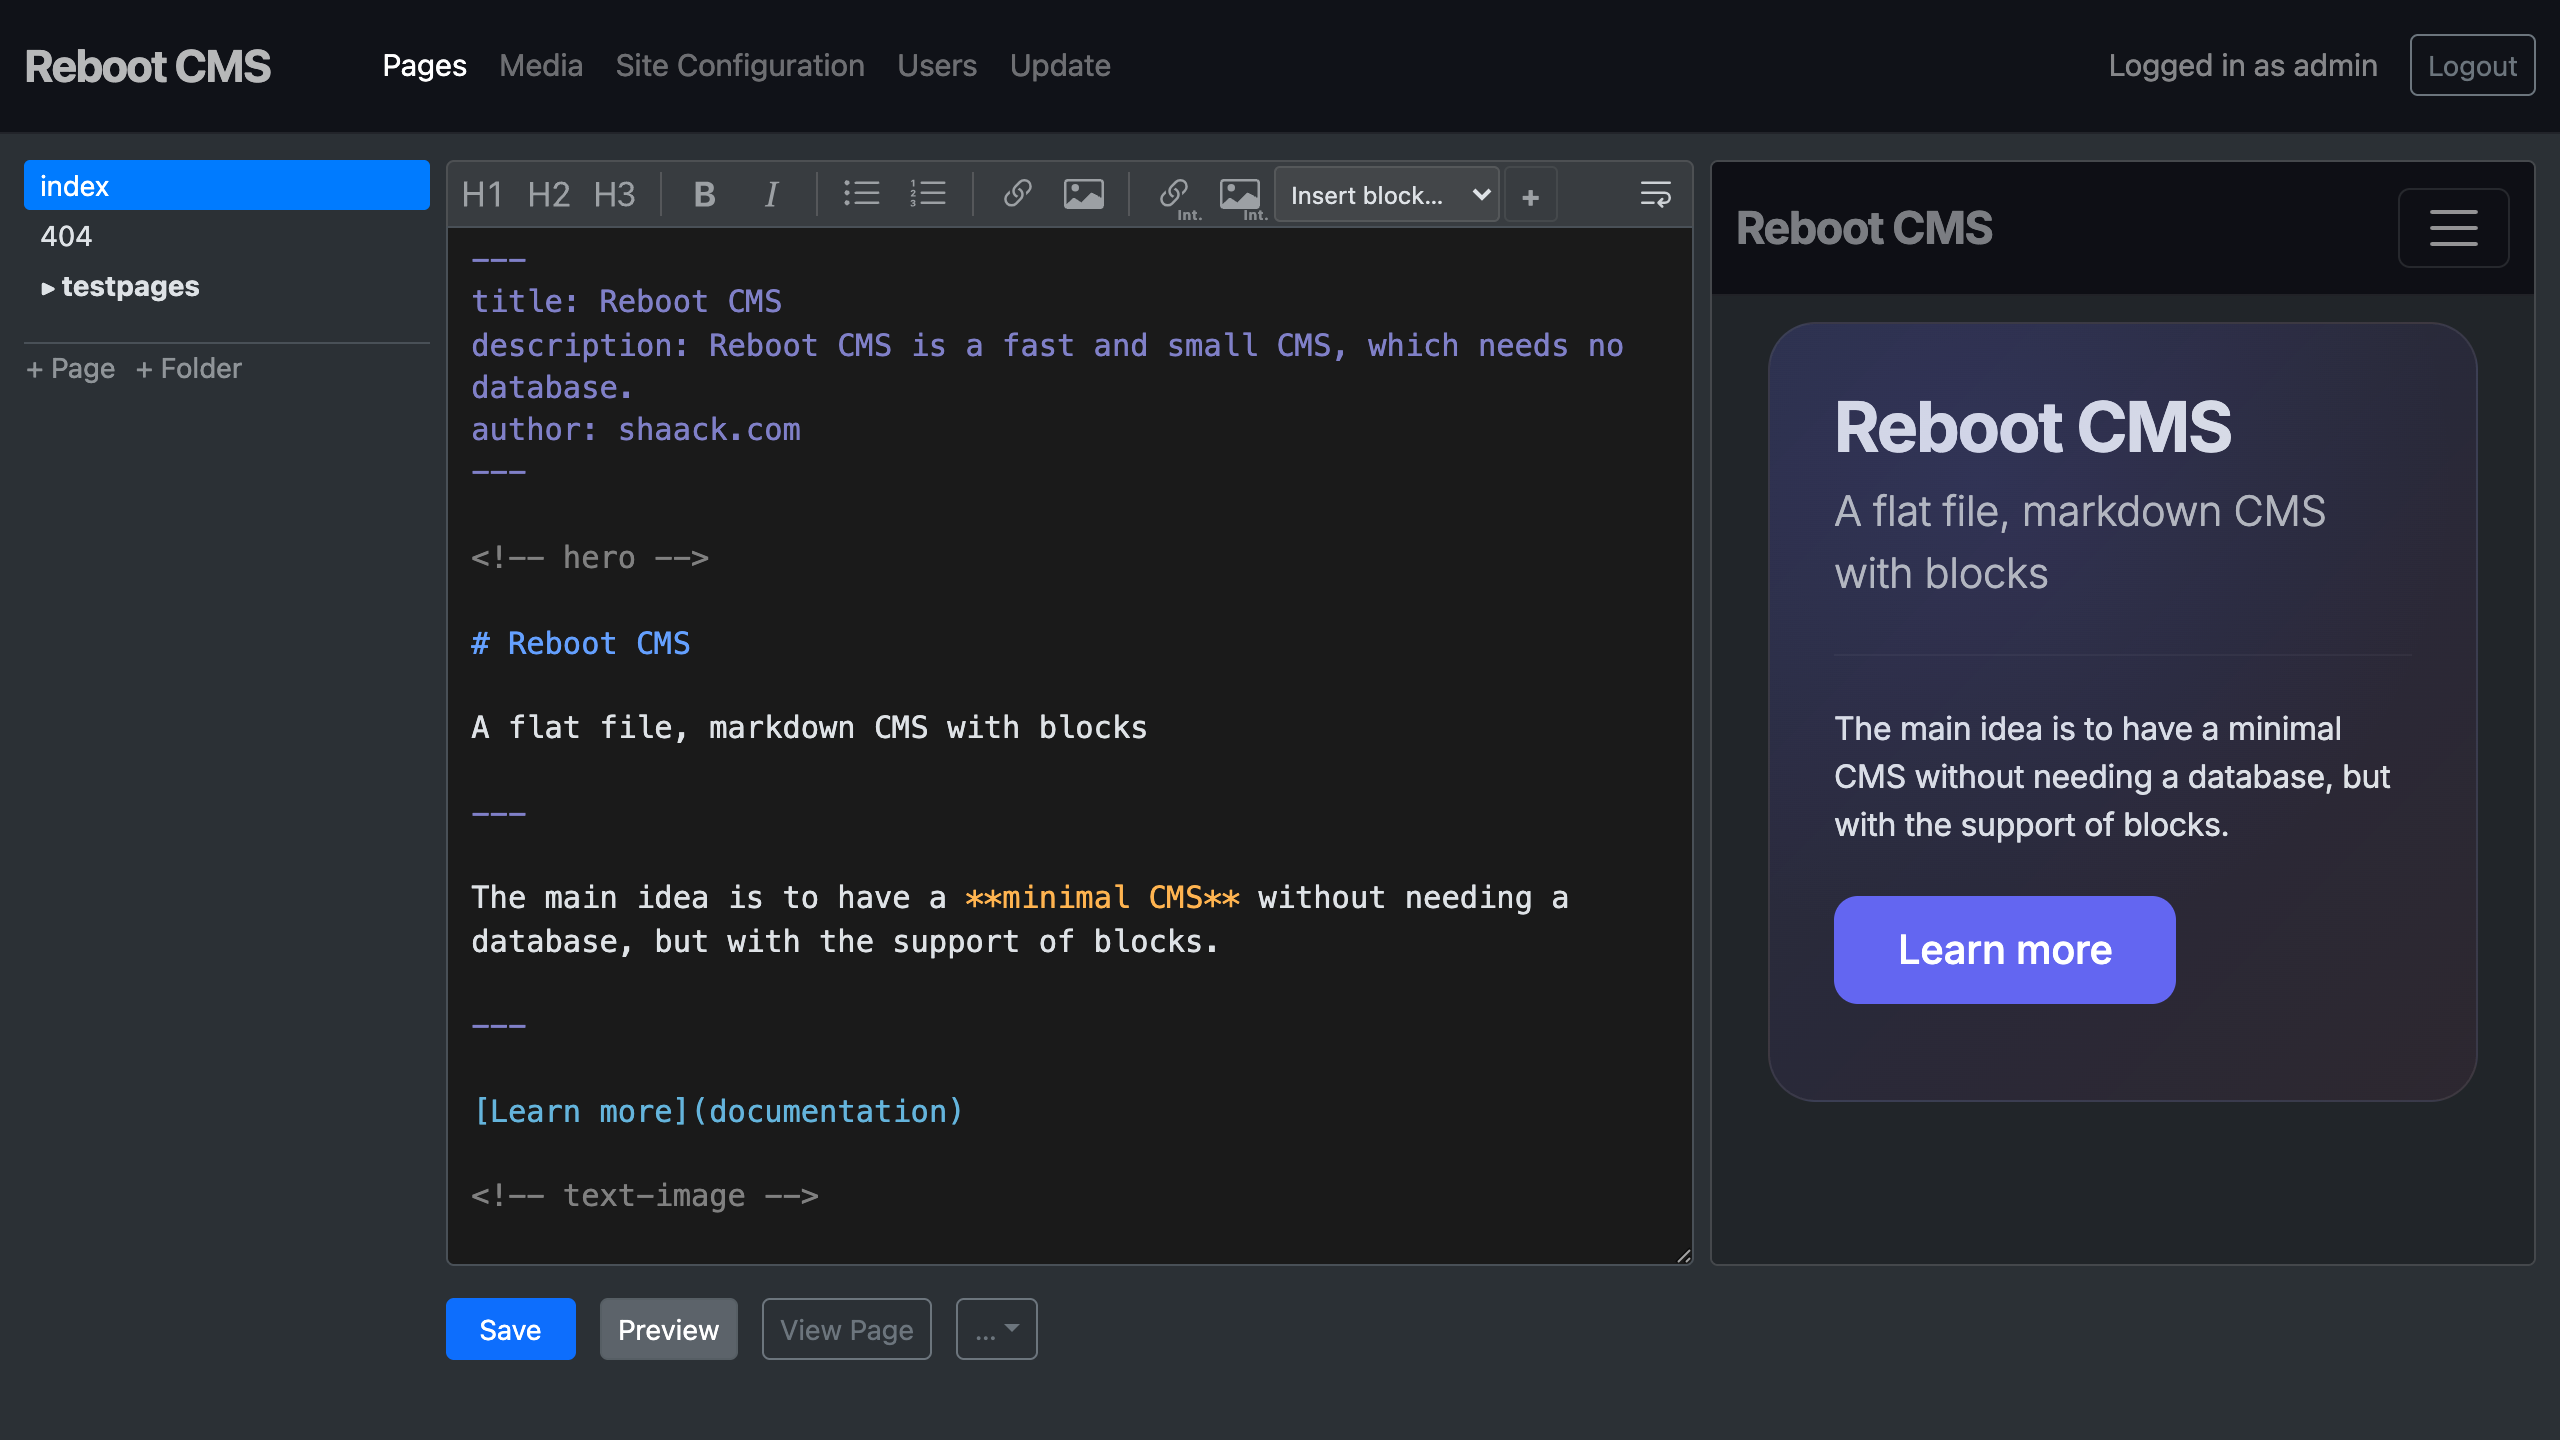
Example for a Markdown Page with Blocks:
This Page contains 3 Block types, "hero", "text-image" and "three-columns". It will render to this:
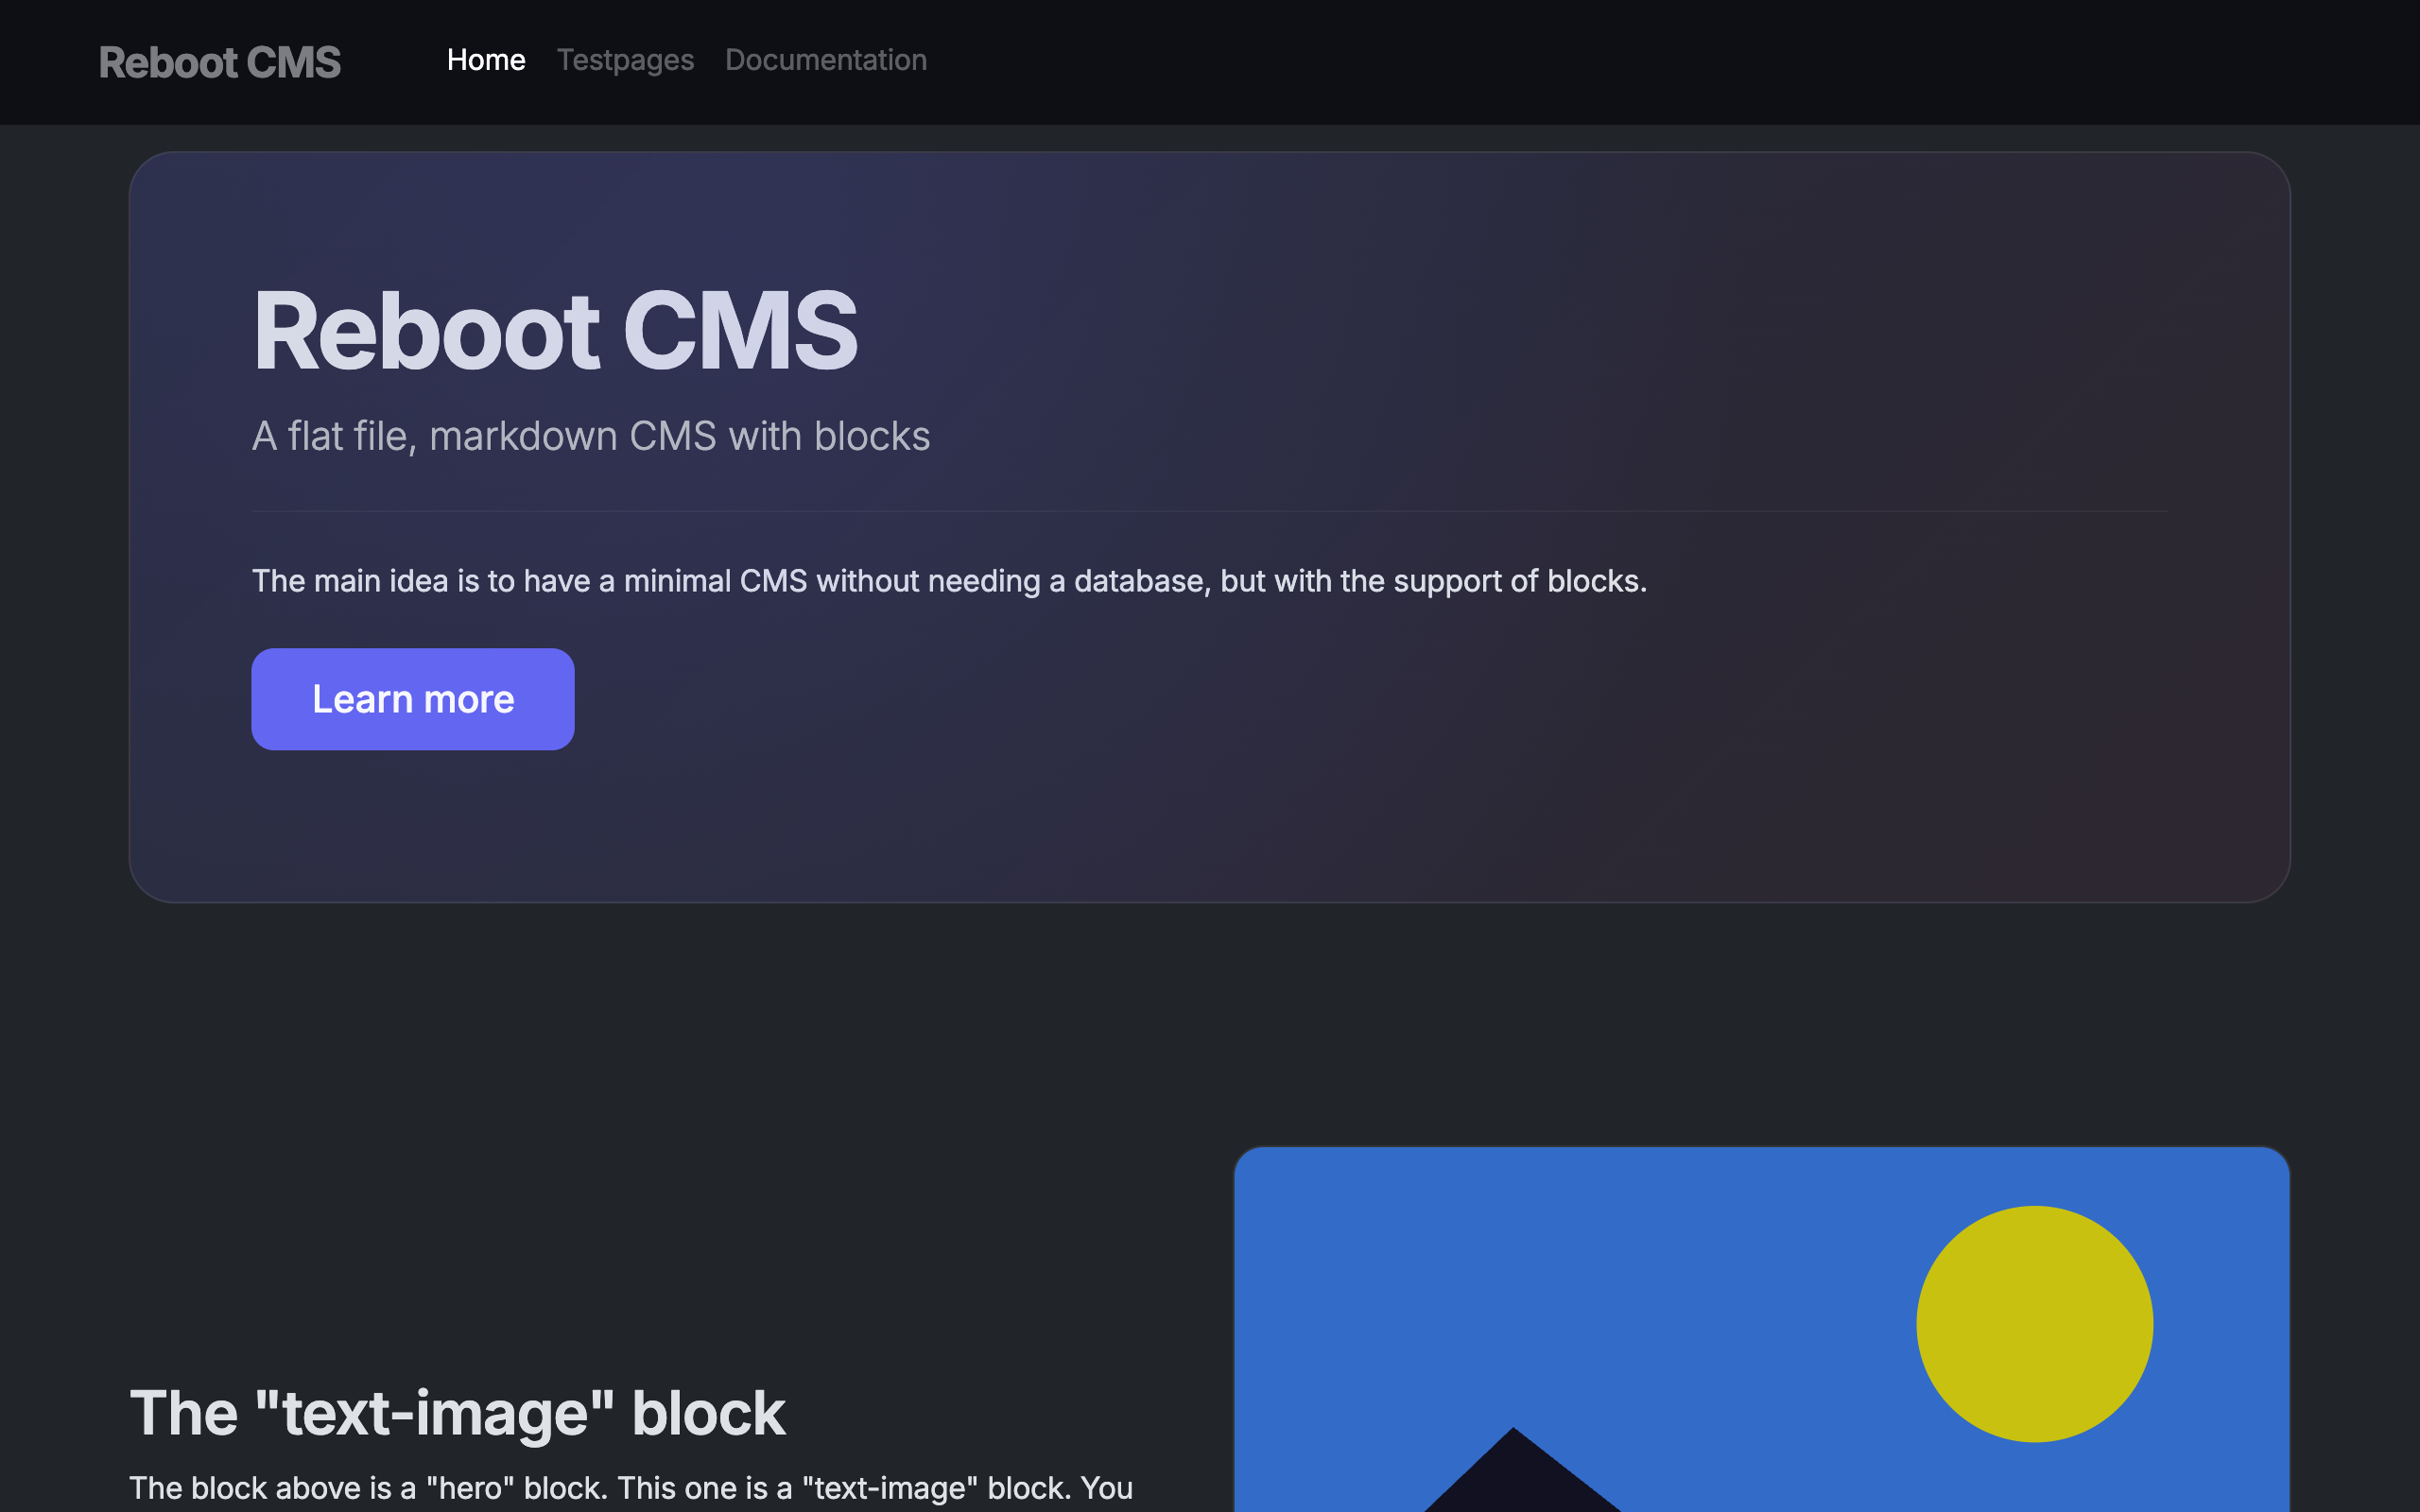
Blocks can be configured in the block comment. With this configuration, the text-image
block allows to display the image to the left side in desktop view.
Markdown files without blocks will render to a flat Markdown page like in every other flat file CMS.
You can define metadata for the page on top of the file in YAML Front Matter syntax.
Block
Folder: /site/blocks
A Block describes how a block is rendered. Blocks are written in PHP.
The code for the "text-image" Block which was used in the page above, looks like this:
Elements in the markdown are queried and used as values for the block. The query syntax
is Xpath with the addition of the part(n) function.
Use $block->content() to get the full block content as rendered HTML (without XPath querying).
This is useful for simple blocks like "text":
Schema validation
$block->xpath() accepts an optional second parameter — an array of props for validation:
| Prop | Type | Description |
|---|---|---|
required |
bool |
Field must match at least once |
description |
string |
Human-readable name, shown in validation warnings |
min |
int |
Minimum number of matches required (for lists) |
max |
int |
Maximum number of matches allowed (for lists) |
When a required field is missing or a minimum count is not met, the CMS logs an error and — in
debug mode (logLevel: 0) — shows a warning banner on the page and a toast with the expected
markdown structure in the admin editor.
Example — the "hero" block with validation:
For list fields (like the "cards" block), use min to require a minimum number of matches:
Admin interface
You find the admin interface at /admin.
If no users exist yet (e.g. on a fresh installation), the admin interface will automatically show a setup page where you can create the first admin account. After that, you can log in with the credentials you created.
In the admin interface you can edit markdown pages with a live preview, manage media files, set the site configuration, manage users and roles, and update the CMS.
Edit a page
The "Pages" section lists all markdown pages in your site. Click on a page name to open it in the editor.
Pages are organized in a tree structure reflecting the folder hierarchy in site/pages/.
A live preview panel can be toggled to see the rendered page side-by-side with the editor (available on screens lg and wider). The preview updates automatically as you type.
The editor tracks page history — every save creates a snapshot. You can view previous versions and
restore them from the History dialog. The number of snapshots kept per page is configurable via
history.maxVersions in local/config.yml.
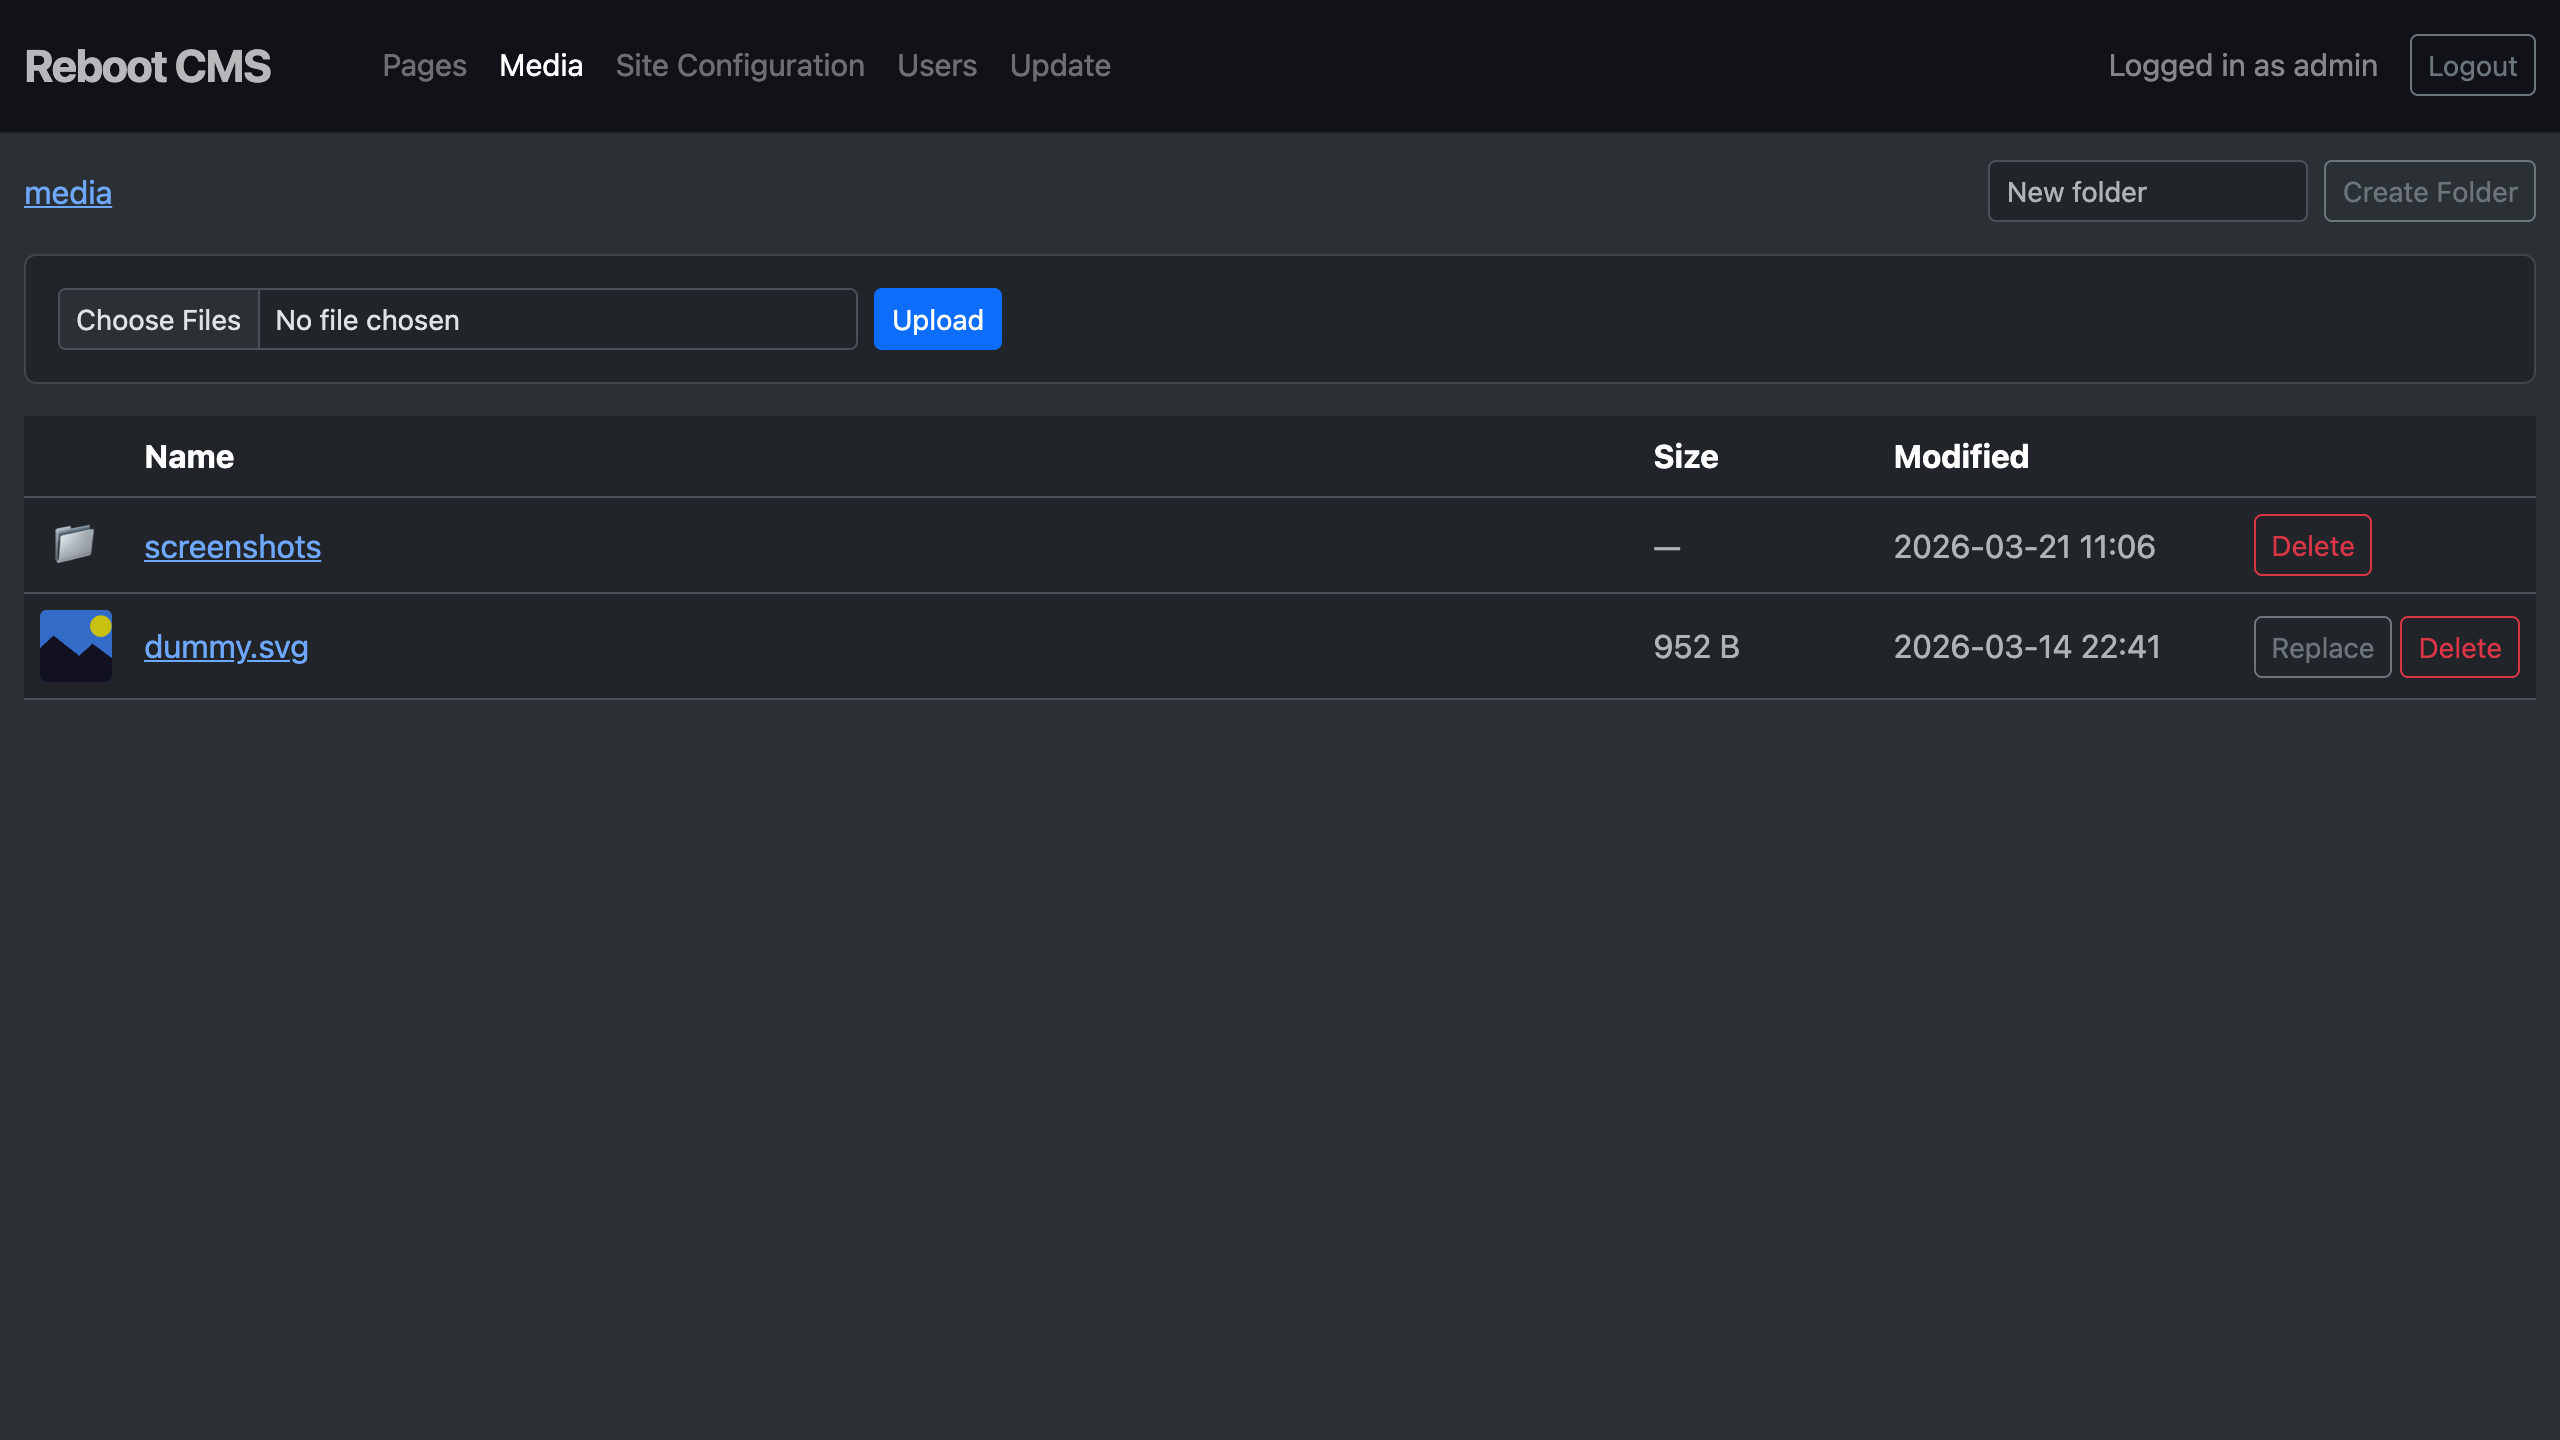
Media
The "Media" section lets you manage files in the web/media/ directory. You can upload files, create folders,
and delete files or empty folders. Media files are accessible at /media/ in the browser and can be referenced
in your markdown pages.
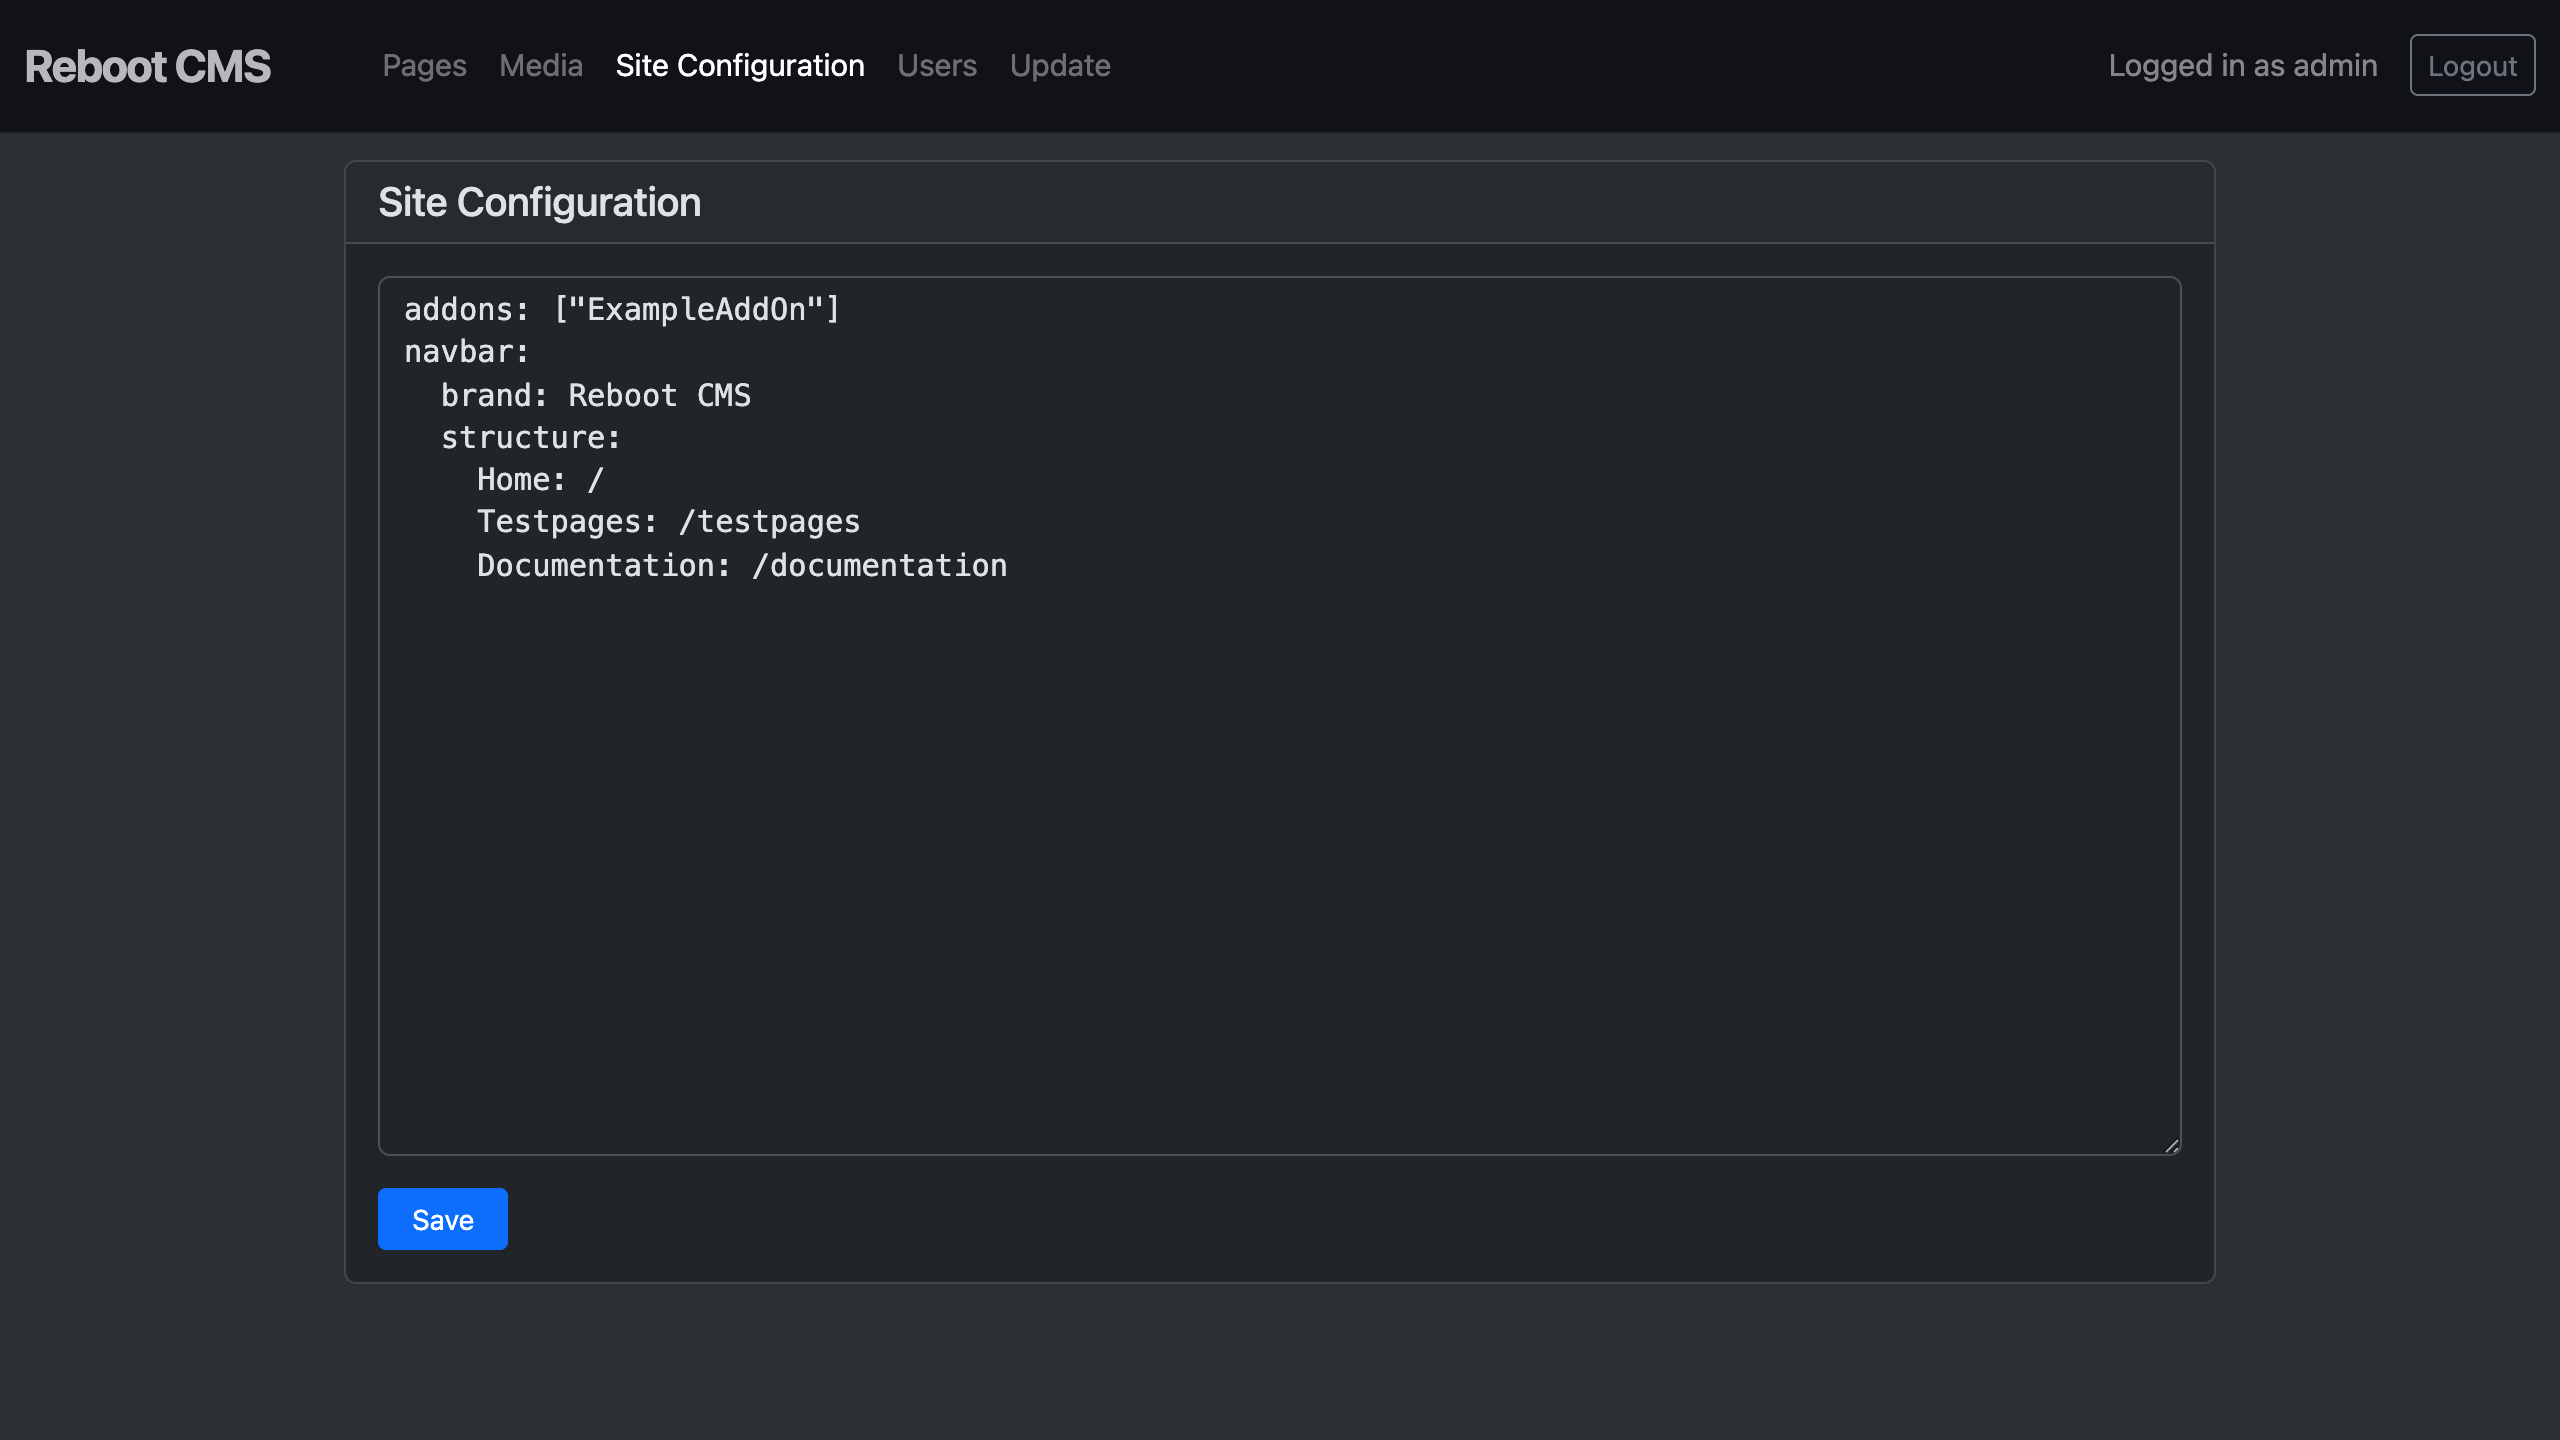
Site configuration
In the site configuration, you can store global values of the site, like the navigation structure or the content of header elements. The site configuration is written in YAML.
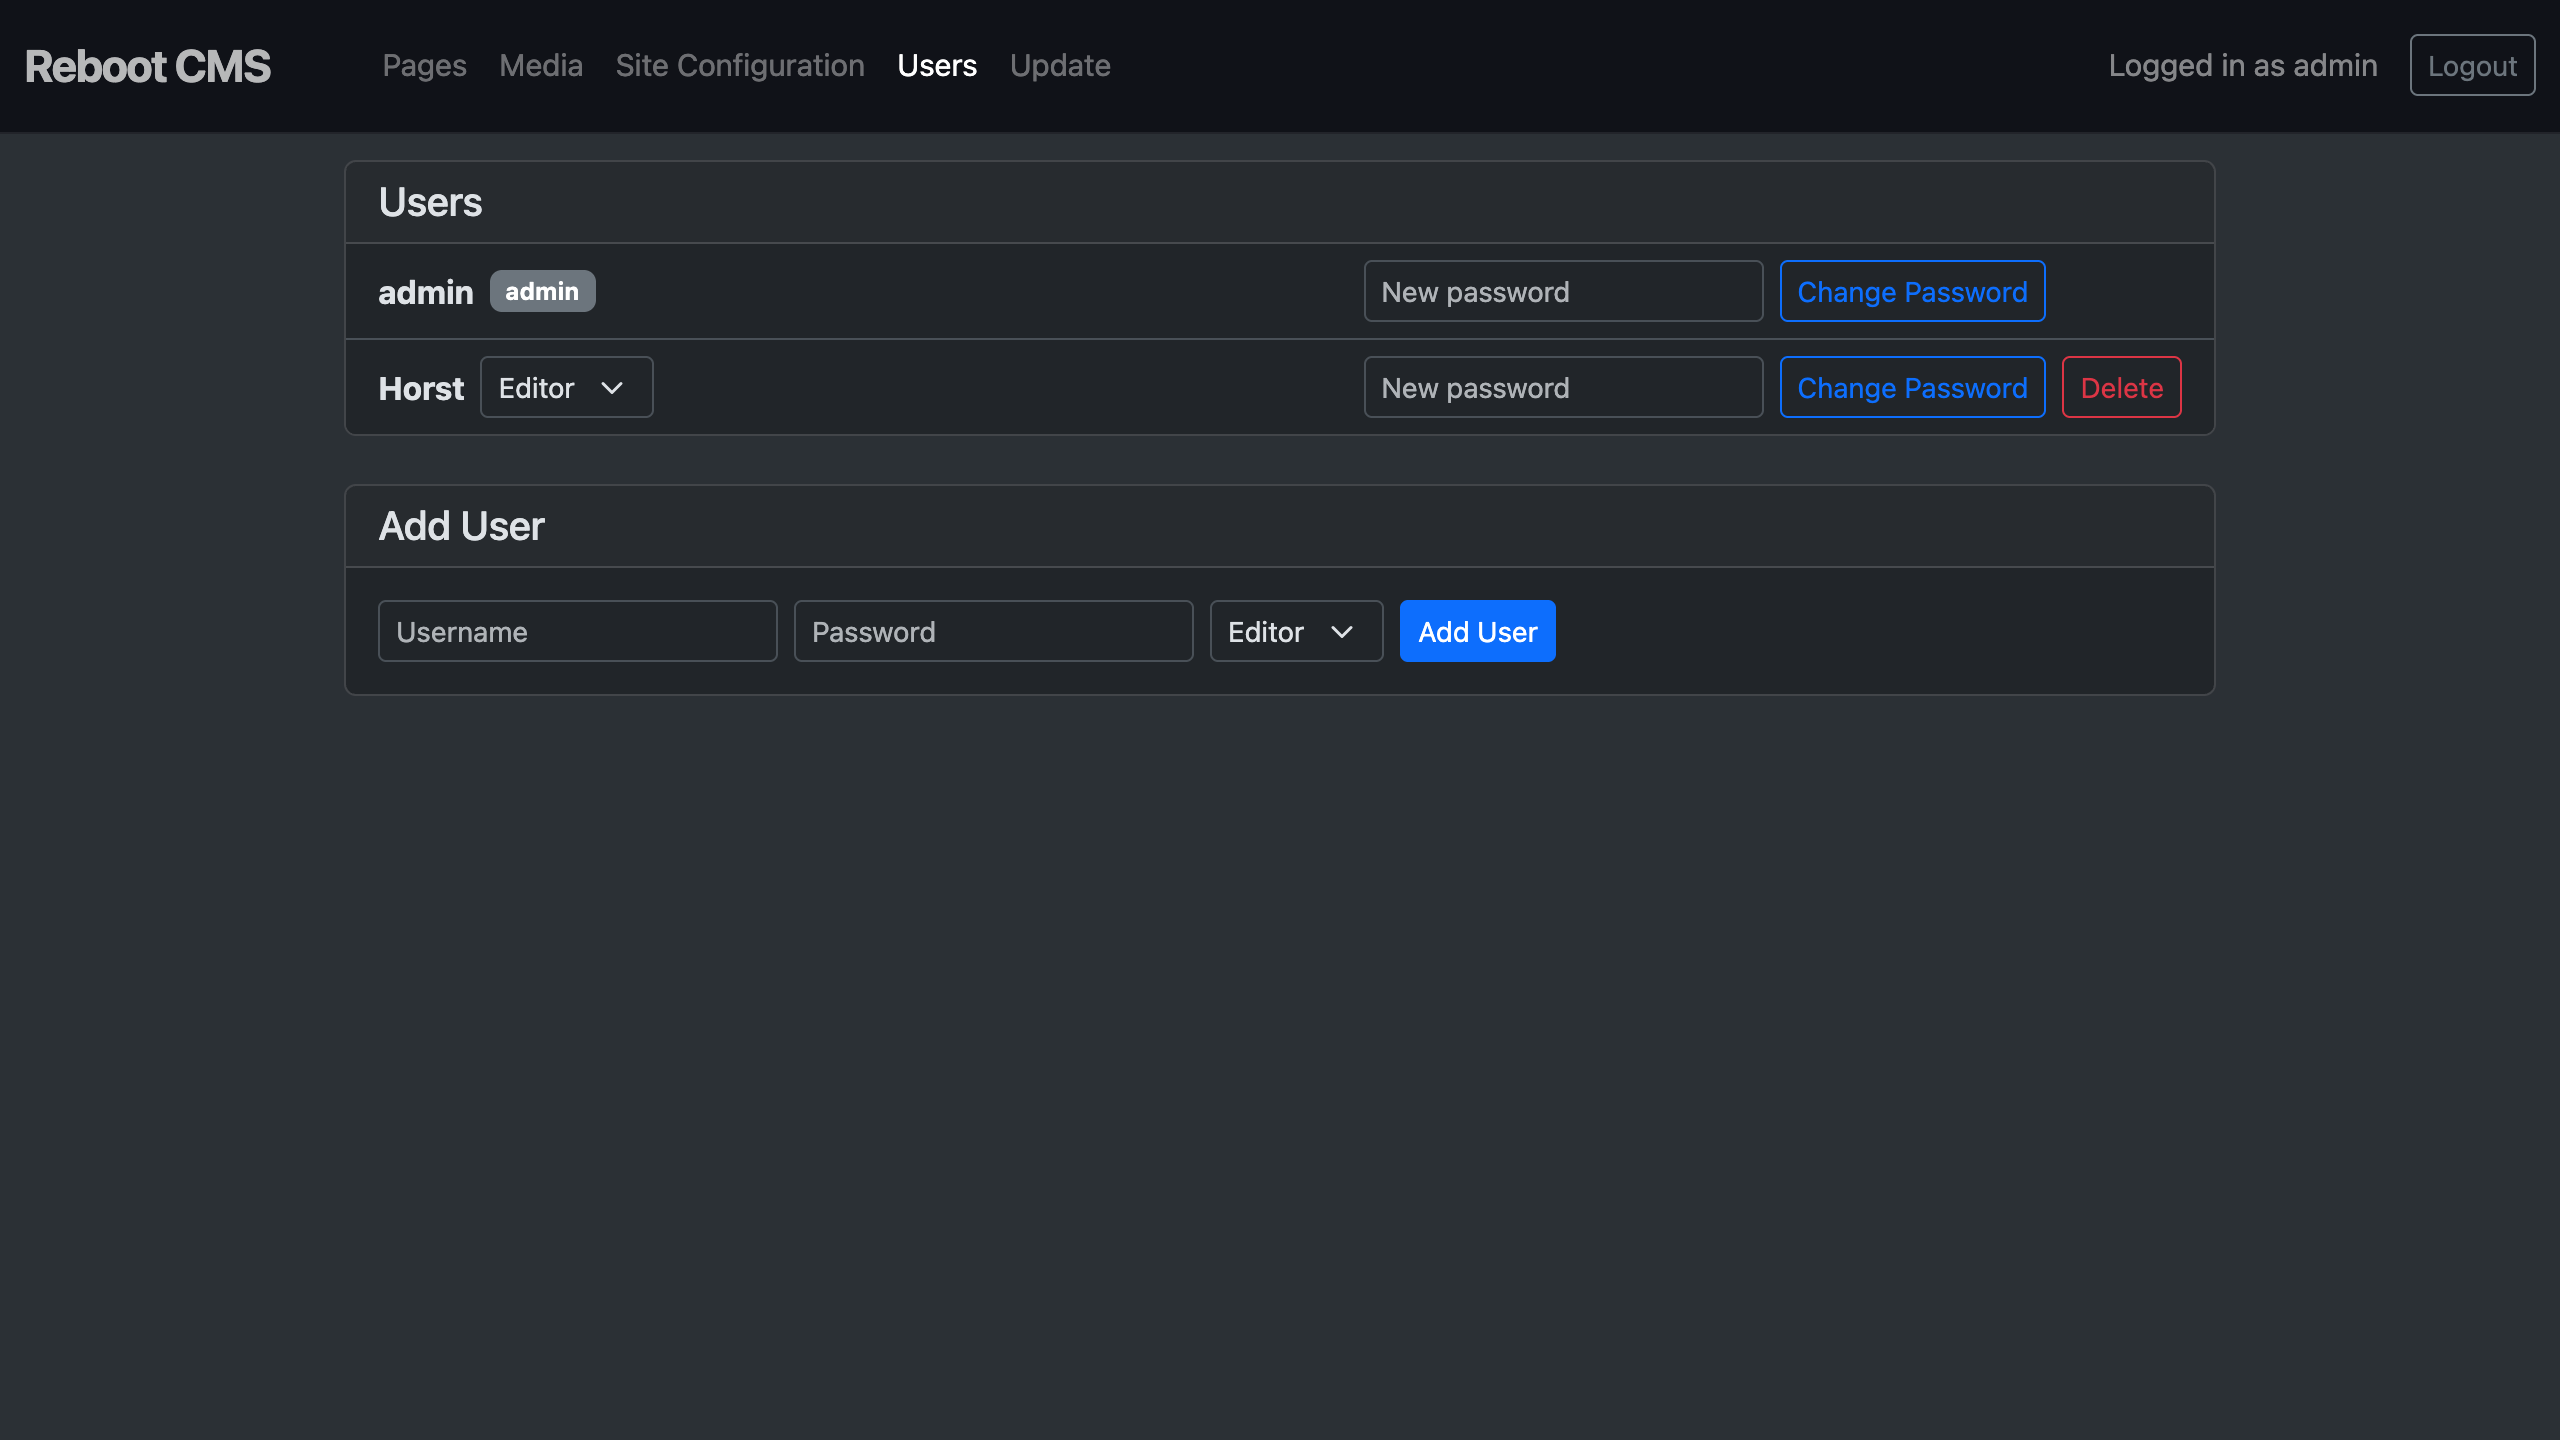
User management
The "Users" page in the admin interface allows you to manage accounts directly from the browser. You can:
- Add users — create new accounts with a username, password, and role
- Change passwords — update the password for any existing user
- Change roles — switch a user between Admin and Editor roles
- Delete users — remove accounts (you cannot delete your own account)
Admins have full access to all admin pages. Editors can only access the page editor and media manager.
Usernames may contain letters, numbers, and underscores (max 64 characters). Passwords must be at least 8 characters.
Credentials are stored as APR1-MD5 hashes in local/.htpasswd, roles in local/roles.yml.
You can also manage users via the command line:
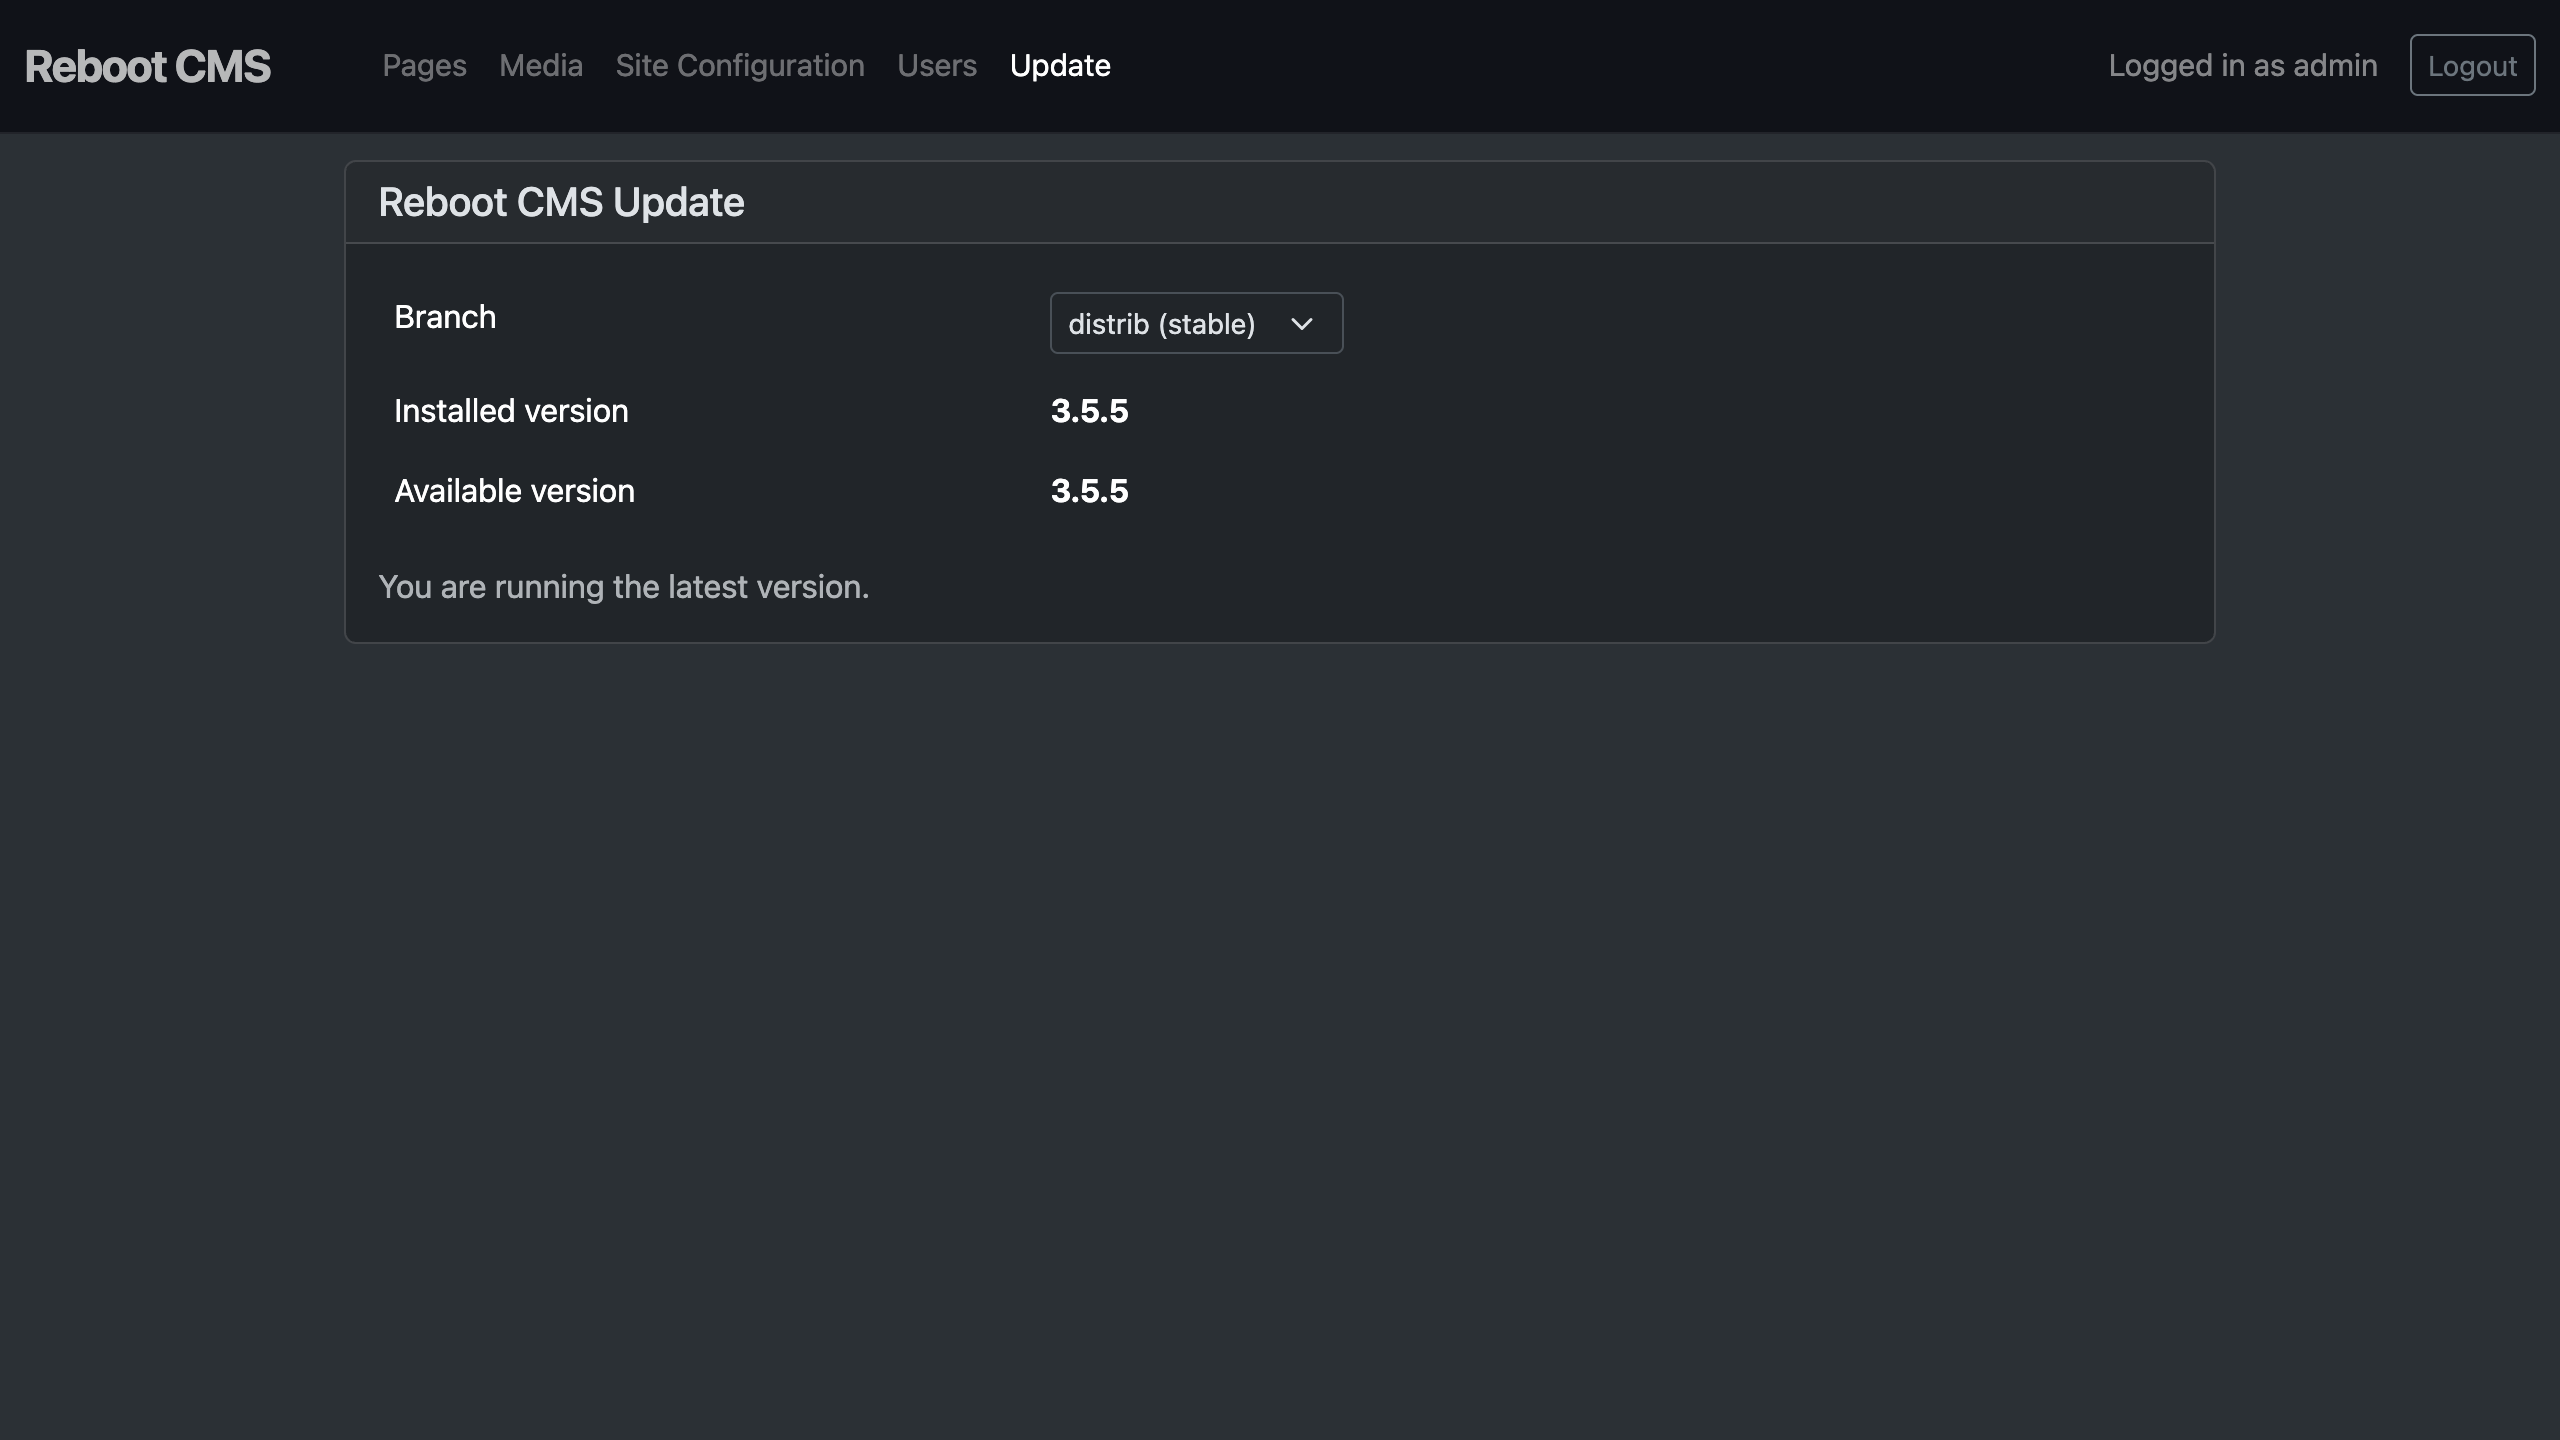
Update
The "Update" page in the admin interface shows the currently installed version and checks for available updates from the GitHub repository.
You can switch between two branches:
- distrib (stable) — versioned releases, compared by version number
- main (unstable) — latest development commits, compared by commit SHA
When an update is available, you can apply it directly from the admin interface. The updater downloads the latest
tarball and replaces core/, web/admin/, and vendor/. Your site content (site/), local configuration (local/),
and entry point (web/index.php) are not affected.
It is recommended to make a backup of the project folder before updating.
AddOns
In Reboot CMS you can extend the functionality of your site with AddOns. AddOns allow you to hook into the request lifecycle to add authentication, modify rendered content, inject headers, track analytics, or implement any custom logic.
Creating an AddOn
An AddOn is a PHP class that extends AddOn. Place your AddOn file in
site/addons/ with the class name matching the file name.
Registering AddOns
Register your AddOns in site/config.yml. They are loaded and executed in the order listed:
Available Properties
Inside your AddOn, you have access to:
$this->reboot— theRebootinstance (base paths, config, redirects)$this->site— theSiteinstance (site config, paths, other addons)
Lifecycle Hooks
init(): void
Called once after construction of the AddOn. Use this to initialize data, read configurations, or start sessions.
preRender(Request $request): bool
Called on every request before rendering the page. Use it to:
- Control access — check authentication and redirect unauthorized users
- Modify request handling — perform redirects based on request path or parameters
Return true to continue rendering the page, or false to stop (e.g. after calling $this->reboot->redirect()).
postRender(Request $request, string $content): string
Called after the page is rendered, before the output is sent to the browser. Use it to:
- Modify HTML output — inject scripts, stylesheets, or meta tags
- Add tracking — append analytics snippets
- Transform content — search and replace patterns in the rendered HTML
Returns the (possibly modified) content string.
Accessing AddOns from Pages
You can access a registered AddOn from any page template using:
Examples
See the included ExampleAddOn.php for a basic implementation. The admin interface itself uses AddOns: Authentication for login session handling and Admin for admin-specific functionality.